Once the flood gates of produce were opened and a round or two of fruit had been flash frozen
and stowed away, we realized that unless we picked up the pace a bit,
the produce was going to rot in my foyer before making it to a pie or
smoothie.
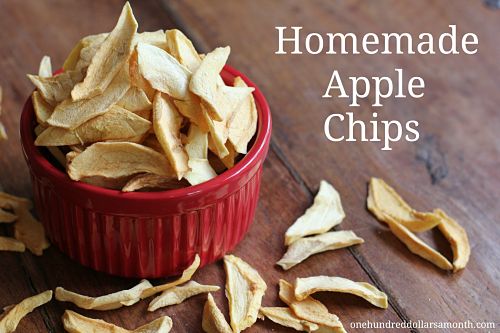
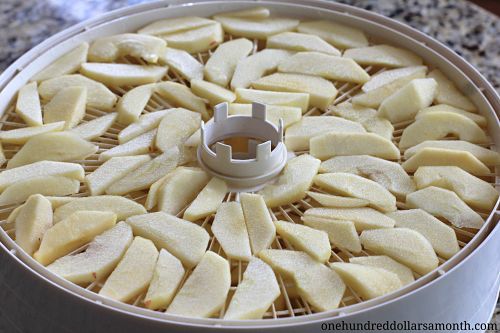
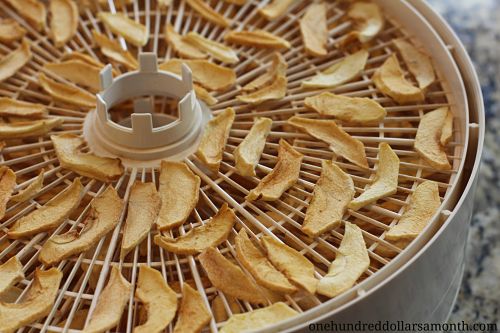
Enter Duke the Dehydrator. (Like the name? We gave it to him last October when we made caramel apple chips for Halloween instead of candy. They’d be excellent as a non-holiday snack too!)
Up until this point in time, my experience in dehydrating put me in the “intermediate” category. I could proudly claim dried apples, bananas, mango, strawberries, carrots and almonds
as successful attempts and winners with the family. The 150 pounds of
various fruits sitting on my kitchen counter was challenging me to a
duel.
18 pounds of grapes and 15 glass pint jars later, I can now add
grapes, blueberries and peaches and to the list of successes as well.
Each type of fruit has its own peculiarities as to how they dry
best. The easiest way to explain is to simply run down the list of
fruits one at a time. So here goes!
Note: This is a very long post with instructions included within
each individual fruit. This makes it easier if you’re looking for one
in particular.
Also, since curious minds probably want to know, I have
this exact dehydrator. Affordable and it gets the job done. It was a birthday gift last year and one of the best birthday gifts ever!
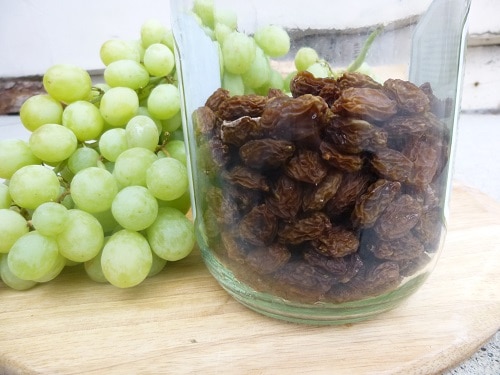
How to Dehydrate Grapes
Want to learn how to make raisins? Although I learned growing up
that raisins were dried grapes, I don’t think I ever put two and two
together until I made them myself! The 18 pounds of grapes from the
produce bash provided an excellent, hands-on learning opportunity for
everyone in the family.
We started with seedless green and seedless red grapes for
experimentation. Both varieties turned out to be excellent for
dehydrating. I imagine it’s possible to use seeded grapes as well, but
you would definitely have to halve and remove the seeds first, before
dehydrating.
- Wash the fruit thoroughly using an all natural produce wash.
Drying is optional, since they’ll dry in the dehydrator anyway.
Although working with dry fruit is easier and less messier than working
with wet fruit.
- If the grapes have seeds, halve the grapes and remove the seeds. It is not necessary to slice whole, unseeded grapes.
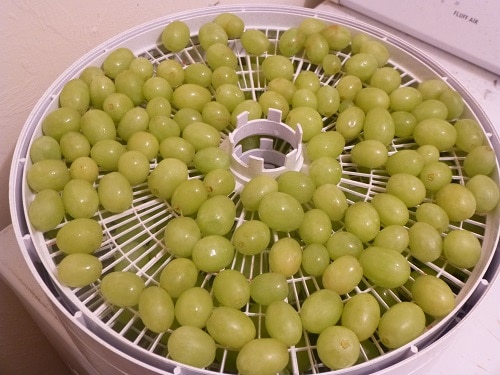
- Lay the clean fruit on the dehydrator trays in a single layer. It’s okay if some of the fruit touches.
- Set the temperature to 135 degrees, the “fruit” setting on most dehydrators.
- Allow to dehydrate for 24-48 hours.
- Grapes are raisins when you squeeze them gently and there is very
little “squish” left. Taste as you go since this may be a learned test
of doneness.
- Yield: 2 pounds of grapes yields approximately two 16 oz glass jars of raisins, depending on the grapes used.
Tips:
- Periodically check on the fruit to see the speed at which they’re
drying (every 6-8 hours). Smaller fruit will dry faster than larger
fruit. They will also shrink in size as they dry, so you can combine
trays and add in more fruit if you’d like.
- Water and juices will be released from the grapes as they dry,
causing them to have a spot on the outside where the sweet, sticky
juices are trying to escape. These juices made it a bit more important
to shuffle every 8 hours if possible to prevent long-term sticking.
This was more prevalent in the red grapes than the green grapes.
- Although they were the same size starting out, dried green raisins are noticeably larger than dried red raisins.
- When handed out to some friends for taste testing, comments such as
“Wow, these are so much more flavorful than regular raisins” were
common.
- You can jump start the dehydrating process by raising temperature to
145 degrees for the first 12 hours. After that, reduce it to 135
degrees to prevent burning or over-drying.
- I plan on keeping my raisins in jars and stored in the pantry for
several months (so I don’t have to spend my grocery budget on dried
cranberries). Because of this, I chose to keep the grapes in the
dehydrator for close to 48 hours.
- If you have a hard time testing whether or not the fruit is “done,”
turn off the dehydrator and let the fruit sit for 30 minutes to cool
before tasting.
How to Dehydrate Bananas
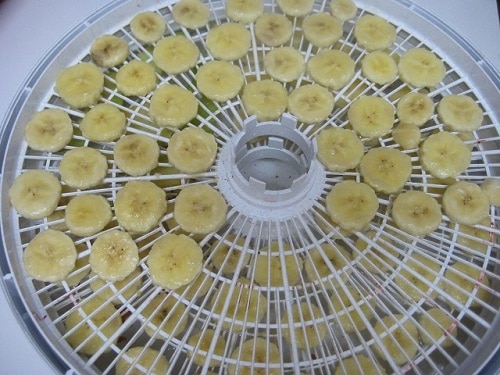
Banana chips are almost as much fun as homemade raisins. If you’re looking for crunch, these are definitely the way to go.
- Peel the banana.
- Cut into 3/8″ rounds for thin strips, or 1/4″ for thick strips. Lay
the slices on the dehydrator trays in a single layer. It’s okay if
some of the fruit touches.
- Set the temperature to 135 degrees.
- Allow to dehydrate for 8-12 hours.
- Bananas are done when you bend them and they are not pliable.
Ideally, they should come very close to breaking when bent. Taste as
you go since this may be a learned test of doneness.
- Yield: one banana yields approximately half a cup of dried banana chips.
Tips:
- Periodically check on the fruit to see the speed at which they’re
drying (every 6-8 hours). Smaller slices will dry faster than larger
fruit. They will also shrink in size as they dry, so you can combine
trays and add in more bananas if you’d like.
- If you have a hard time testing whether or not the fruit is “done,”
turn off the dehydrator and let the fruit sit for 30 minutes to cool
before tasting.
- If you want chunks instead of slices, dehydrate thicker slices of
fruit and chop up with a sharp knife after the dehydrating process.
- Bananas may change colors through the dehydrating process. If this
is a concern, gently slice the bananas into a 1 part apple cider vinegar
to 4 part water solution. A very quick soak – one minute or so – is
enough to cancel out the discoloration.
- Bananas can be flavored before drying by sprinkling spices into the
water bath, or gently on top of the slices fruit once laid in the
dehydrator. Remember that the flavor will condense through the drying
process, so a little bit goes a long way.
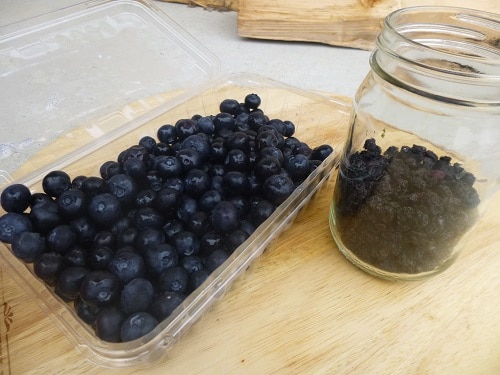
How to Dehydrate Blueberries
Dehydrating blueberries provides a way to incorporate the fruit into fun snacks like granola bars or trail mix.
If your blueberries are small to begin with, they will inevitably fall
through larger holes in the trays. You can use the solid trays that
come with dehydrators (often used for fruit rolls) to prevent escaping
berries.
- Wash the fruit thoroughly using an all natural produce wash.
Drying is optional, since they’ll dry in the dehydrator anyway.
Although working with dry fruit is easier and less messier than working
with wet fruit.
- Remove all the stems and lay the clean fruit on the dehydrator trays in a single layer. It’s okay if some of the fruit touches.
- Set the temperature to 115 degrees. The low temperature ensures the fruit doesn’t burn or char.
- Allow to dehydrate for 8-18 hours.
- Blueberries are done when you squeeze them and very little “squish”
left. Taste as you go since this may be a learned test of doneness.
- Yield: a clamshell of blueberries (18oz) yields approximately one 8oz glass jars of dried blueberries.
Tips:
- Periodically check on the fruit to see the speed at which they’re
drying (every 6-8 hours). Smaller fruit will dry faster than larger
fruit. They will also shrink in size as they dry, so you can combine
trays and add in more fruit if you’d like.
- If you have a hard time testing whether or not the fruit is “done,”
turn off the dehydrator and let the fruit sit for 30 minutes to cool
before tasting.
How to Dehydrate Strawberries
Strawberries are another fun fruit to dehydrate – they’re SO easy to snack on!
- Wash the fruit thoroughly using an all natural produce wash.
Drying is optional, since they’ll dry in the dehydrator anyway.
Although working with dry fruit is easier and less messier than working
with wet fruit.
- Remove the stems and cut the fruit in half. Laying the strawberries
on their sides, cut into 3/8″ slices for thin strips, or 1/4″ for
thicker strips. Lay the slices on the dehydrator trays in a single
layer. End pieces should be laid with skin side down. It’s okay if
some of the fruit touches.
- Set the temperature to 115 degrees. The low temperature ensures the fruit doesn’t burn or char.
- Allow to dehydrate for 8-18 hours.
- Strawberries are done when you squeeze them and very little “squish”
left. Taste as you go since this may be a learned test of doneness.
- Yield: 1 pound of strawberries yields approximately one 16oz glass jars of dried strawberries.
Tips:
- Periodically check on the fruit to see the speed at which they’re
drying (every 6-8 hours). Smaller fruit will dry faster than larger
fruit. They will also shrink in size as they dry, so you can combine
trays and add in more fruit if you’d like.
- If you have a hard time testing whether or not the fruit is “done,”
turn off the dehydrator and let the fruit sit for 30 minutes to cool
before tasting.
- If you want chunks instead of slices, dehydrate thicker slices of
fruit and chop up with a sharp knife after the dehydrating process.
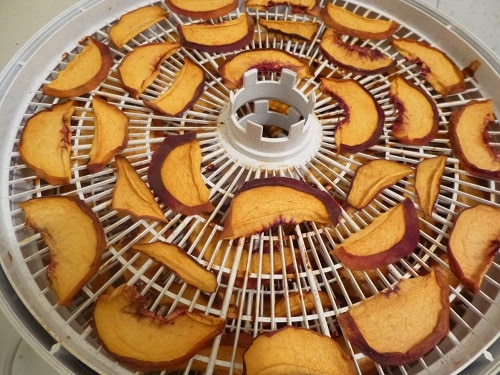
How to Dehydrate Peaches
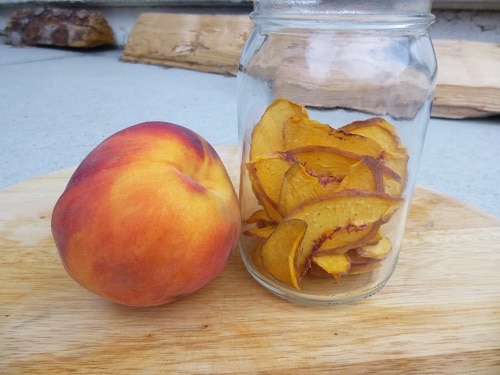
Slices of dehydrated peaches are so much fun to gnaw on, even as an
adult! Thick slices would be excellent for teething babies as they
won’t break off easily. Like blueberries, dried peaches would also be
great in granola bars or trail mix. Maybe some dried pineapple and coconut chunks too for a tropical variation!
- Wash the fruit thoroughly using an all natural produce wash.
Drying is optional, since they’ll dry in the dehydrator anyway.
Although working with dry fruit is easier and less messier than working
with wet fruit.
- It is not necessary to remove the skin, you may if you’d like.
- Cut the peaches in half and remove the pits. Laying each peach with
skin side up, cut into approximate 3/8″ slices for thick strips, or
1/4″ for thinner strips. Lay the slices on the dehydrator trays in a
single layer. End pieces should be laid with skin side down. It’s okay
if some of the fruit touches.
- Set the temperature to 135 degrees.
- Allow to dehydrate for 8-12 hours.
- Peaches are done when you squeeze them and very little “squish”
left. Taste as you go since this may be a learned test of doneness.
- Yield: one large peach yields approximately half of one 8oz glass jars of dried peach slices.
Tips:
- Periodically check on the fruit to see the speed at which they’re
drying (every 6-8 hours). Smaller slices will dry faster than larger
fruit. They will also shrink in size as they dry, so you can combine
trays and add in more grapes if you’d like.
- If you have a hard time testing whether or not the fruit is “done,”
turn off the dehydrator and let the fruit sit for 30 minutes to cool
before tasting.
- If you want chunks instead of slices, dehydrate thicker slices of
fruit and chop up with a sharp knife after the dehydrating process.
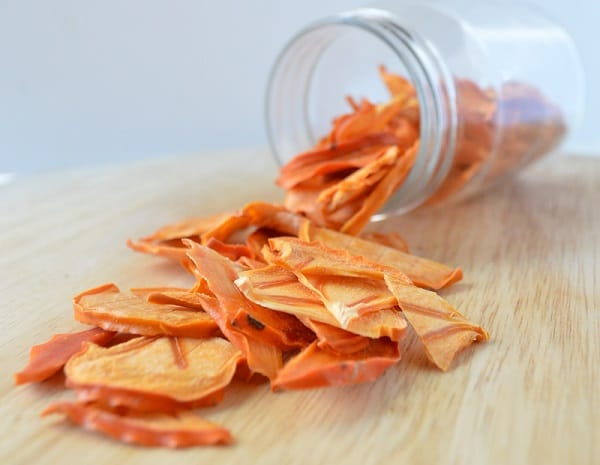
How to Dehydrate Persimmon
Fuyu persimmon are a bright orange fruit, naturally sweet and have
the texture of a firm peach, or a soft apple. Avoid the Asian
persimmon, as those are bitter and should be roasted first.
- Wash the fruit thoroughly using an all natural produce wash.
Drying is optional, since they’ll dry in the dehydrator anyway.
Although working with dry fruit is easier and less messier than working
with wet fruit.
- It is not necessary to remove the skin.
- Cut the persimmon in half and lay each half on its side. Cut into
approximate 3/8″ slices for thin strips, or 1/4″ for thicker strips.
Lay the slices on the dehydrator trays in a single layer. It’s okay if
some of the fruit touches.
- Set the temperature to 135 degrees.
- Allow to dehydrate for 8-12 hours.
- Persimmons are done when you squeeze them and very little “squish”
left. Taste as you go since this may be a learned test of doneness.
- Yield: one large persimmon yields approximately half of one 8oz glass jars of dried persimmon slices.
Tips:
- Periodically check on the fruit to see the speed at which they’re
drying (every 6-8 hours). Smaller slices will dry faster than larger
fruit. They will also shrink in size as they dry, so you can combine
trays and add in more fruit if you’d like.
- If you have a hard time testing whether or not the fruit is “done,”
turn off the dehydrator and let the fruit sit for 30 minutes to cool
before tasting.
- If you want chunks instead of slices, dehydrate thicker slices of
fruit and chop up with a sharp knife after the dehydrating process.

How to Dehydrate Pineapple
Pineapples are naturally sweet and when dehydrated, the sweet becomes richer and deeper, making an absolutely delicious snack!
- Cut the tops and bottom off a fresh pineapple. Stand the pineapple
on its end and carefully cut the outer skin off, leaving just the yellow
flesh.
- Cut the pineapple into quarters from top to bottom. Remove 1/2″ of core from each quarter.
- Laying each quarter on its side, slice the pineapple into 3/8″
slices for thin strips, or 1/4″ for thicker strips. Lay the slices on
the dehydrator trays in a single layer. It’s okay if some of the fruit
touches.
- Set the temperature to 135 degrees.
- Allow to dehydrate for 12-18 hours.
- Pineapples are done when you squeeze them and very little “squish”
left. Taste as you go since this may be a learned test of doneness.
- Yield: one large pineapple yields approximately two of 8oz glass jars of dried pineapple slices.
Tips:
- Periodically check on the fruit to see the speed at which they’re
drying (every 6-8 hours). Smaller slices will dry faster than larger
fruit. They will also shrink in size as they dry, so you can combine
trays and add in more fruit if you’d like.
- If you have a hard time testing whether or not the fruit is “done,”
turn off the dehydrator and let the fruit sit for 30 minutes to cool
before tasting.
- If you want chunks instead of slices, dehydrate thicker slices of
fruit and chop up with a sharp knife after the dehydrating process.
How to Dehydrate Mango
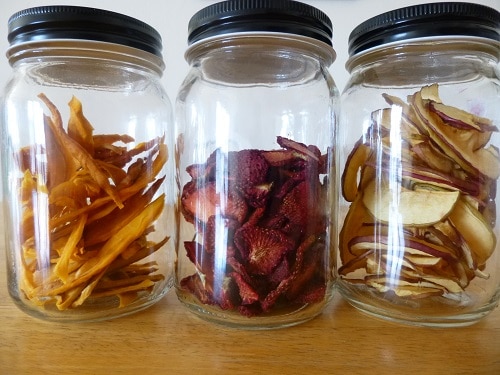
Mangos tied with peaches for which fruit was the most fun to chew on –
my son chose mangos and my daughter chose peaches! The mangos are in
the far left of the above picture. (Strawberries are in the middle and
apples on the right. We kept those jars on the kitchen table for easy
snacking and it was PERFECT.)
- Hold the mango so that the oblong shape is vertical (points at the
top and bottom). Cut off one side of the mango approximately 1/2″ from
the center. Repeat with the other side.
- Cut each half into thirds, for one long strip and two boat-shaped
end pieces. Lay the fruit skin side down and using a sharp,
non-serrated knife, carefully filet the flesh from the skin. Cut off
any smaller remaining pieces of flesh from the skin and reserve for
smoothies or snacks.
- Slice the flesh of the skin into 3/8″ slices for thin strips, or
1/4″ for thick strips. Lay the slices on the dehydrator trays in a
single layer. End pieces should be laid with skin side down. It’s okay
if some of the fruit touches.
- Set the temperature to 135 degrees.
- Allow to dehydrate for 8-12 hours.
- Mangoes are done when you squeeze them and very little “squish”
left. Taste as you go since this may be a learned test of doneness.
- Yield: one large mango yields approximately half of one 8oz glass jars of dried mango slices.
Tips:
- Periodically check on the fruit to see the speed at which they’re
drying (every 6-8 hours). Smaller slices will dry faster than larger
fruit. They will also shrink in size as they dry, so you can combine
trays and add in more fruit if you’d like.
- If you have a hard time testing whether or not the fruit is “done,”
turn off the dehydrator and let the fruit sit for 30 minutes to cool
before tasting.
- If you want chunks instead of slices, dehydrate thicker slices of
fruit and chop up with a sharp knife after the dehydrating process.
How do you dehydrate fruit? Share your tips and ideas in the comment section!
Disclaimer: This post contains affiliate links. By making a
purchase through those links, I will earn commission that helps to keep
the lights on in the Crumbs house – with no additional cost to you.
Thank you for supporting Crumbs in this way. Thanks for information : http://dontwastethecrumbs.com/2013/08/how-to-dehydrate-fruit-basic-food-preservation/